

Most people think an emergency fund is just one pile of cash. But a truly resilient financial plan works like a layered defense system. You need different amounts for different kinds of shocks—a flat tire is not the same as a six-month job loss.
A tiered emergency fund organises your savings into three distinct layers: short-term, medium-term, and deep safety nets. This approach prevents you from dipping into long-term investments for small hiccups and gives you genuine peace of mind at every stage of life.
In this guide, you’ll learn exactly how to build each tier, how much to save, and which resources can accelerate your journey toward true financial resilience.
Table of Contents
Why One Fund Isn’t Enough
A single emergency account often leads to confusion. You might hesitate to use it for a $200 dental bill because “it’s for the big stuff.” Or worse, you drain it on a moderately bad month and have nothing left when a real crisis hits.
Tiering solves this by matching your savings to the type, duration, and urgency of potential emergencies. It also aligns with the core idea from The Psychology of Money: managing emotions is just as important as managing math. If you want to dive deeper into the mindset behind money decisions, 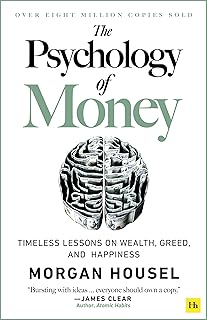 is a must-read.
Tier 1: Short-Term Emergency Fund (Liquidity Layer)
Purpose: Cover small, unexpected expenses without touching your main savings.
Target amount: $500 – $2,000 (or one month of essential expenses, whichever is lower)
Where to keep it: High-yield savings account or a checking account with a separate sub-account
Short-term emergencies happen fast: a minor car repair, a last-minute school trip, a prescription refill that isn’t fully covered by insurance. This tier acts like a shock absorber. It keeps you from using credit cards or payday loans, which can spiral into debt.
How to build it quickly:
- Sell unused items around the house
- Cut one non-essential subscription for two months
- Deposit every windfall (tax refund, gift, bonus) until you reach the target
Example: You hit a pothole and need $400 for a tire replacement. You withdraw from your short-term fund, replace the tire, and then replenish the fund over the next two weeks. No stress, no debt.
Tier 2: Medium-Term Emergency Fund (Stability Layer)
Purpose: Handle moderate disruptions like a short illness, a major home appliance failure, or a temporary income dip.
Target amount: 3 – 6 months of essential living expenses
Where to keep it: A high-yield savings account (HYSA) or a money market account – still liquid but earning interest.
This is the layer most personal finance experts talk about. It protects you from the “middle-class crisis” – something that lasts a few weeks to a few months. If you lose your job and find a new one in eight weeks, this tier covers rent, groceries, and utilities seamlessly.
Why 3–6 months?
- Single, stable income: Aim for 4–5 months
- Dual income with low risk: 3 months may be enough
- Freelancer or variable income: Push toward 6+ months
Pro tip: Automate a weekly transfer of $50 into this account. In one year, you’ll have over $2,600 – and you probably won’t even miss it.
Tier 3: Deep Safety Net (Resilience Layer)
Purpose: Survive catastrophic events – long-term unemployment, a disability period, or a major medical crisis.
Target amount: 6 – 12 months of living expenses (or even up to 24 months for high-risk professions)
Where to keep it: A mix of a HYSA and low-risk fixed-income instruments like CDs or Treasury bills (ladder them for better returns).
This tier is not for “maybe” emergencies. It’s for “I never thought this would happen to me” scenarios. If you’re a small business owner, a single-income household, or work in a volatile industry, this deep safety net becomes your ultimate peace of mind.
Key principles:
- Keep principal safe. Do not invest this money in stocks.
- Replenish it aggressively if you ever have to use it.
- Review the amount every year – adjust for inflation or lifestyle changes.
Real-world example: After a serious accident, Sarah couldn’t work for 14 months. Her deep safety net (10 months of expenses) plus disability insurance got her through without selling her home or taking high-interest loans.
How to Build Your Tiered System (Step by Step)
- Start with Tier 1. Get that $1,000 floor as fast as possible. Use the sale of unused items or a short-term side hustle.
- Next, build Tier 2. Set up an automatic monthly transfer. Aim for 3 months of expenses within a year.
- Finally, expand to Tier 3. Once Tiers 1 and 2 are solid, direct additional savings to the deep safety net until you reach your target.
Remember that building financial resilience is a personal development journey. It teaches discipline, patience, and self-trust. For a foundational mindset shift, read  . It’s a classic that explains why the wealthy think in layers, not lump sums.
Comparison: Two Must-Read Books for Your Financial Resilience Library
| Feature | Rich Dad Poor Dad | The Psychology of Money |
|---|---|---|
| Focus | Mindset shift about assets vs. liabilities | Behavioral finance and emotional relationship with money |
| Best For | Beginners rethinking their core money beliefs | Anyone wanting to understand why we make irrational money choices |
| Price | $9.31 | $10.99 |
| Rating | ⭐ 4.7 (107,400+ reviews) | ⭐ 4.7 (71,600+ reviews) |
| Buy at Amazon |  |
|
Both books complement your tiered emergency fund strategy. Rich Dad Poor Dad helps you see the big picture of income and assets. The Psychology of Money keeps you grounded when fear or greed tempt you to break your savings discipline.
Common Mistakes to Avoid
- Keeping all tiers in one account. You’ll blur the lines and overspend on small stuff.
- Skipping Tier 3 altogether. Many people stop at 3 months, thinking it’s enough. But life’s black swans can last longer.
- Investing the deep safety net. CDs and Treasury bills are fine; stocks are not. You cannot afford a 30% drop right when you need cash.
- Not adjusting for inflation. Every year, increase your targets by at least 2–3%.
Internal Resources to Strengthen Your Plan
Building a tiered fund is only one piece of the resilience puzzle. These related guides will help you go deeper:
- Why an Emergency Fund Is Emotional Security, Not Just Financial Security
- How to Build a Starter Emergency Fund When Money Is Tight
- Designing a Personal Financial Resilience Plan for Life’s Unknowns
- Digital Tools and Automations to Make Saving for Emergencies Effortless
- What to Do First Financially When You Lose a Job or Income Source
Frequently Asked Questions
1. Do I really need three separate bank accounts?
Not necessarily. You can keep all tiers in the same high-yield savings account as long as you mentally track the amounts. However, using separate accounts (or even sub-accounts within an app like Ally or Marcus) makes discipline easier and reduces the temptation to borrow from your deep safety net.
2. Should I pay off debt before building a tiered emergency fund?
Yes, but only high-interest debt (credit cards, payday loans). Build at least Tier 1 first ($1,000) to avoid using cards during emergencies. Then tackle high-interest debt. After that, build all three tiers simultaneously while making minimum payments on low-interest debt.
3. How often should I review my tiers?
Review your target amounts annually – ideally at the same time you update your budget. Major life changes (marriage, children, job shift) also trigger a review. If your expenses increase, increase your tiers accordingly.
4. Can I use retirement accounts as a deep safety net?
Only as a last resort. Early withdrawals from 401(k)s or IRAs trigger taxes and penalties. Your tiered system should be strictly separate from retirement. If you’re tempted to raid retirement, your deep safety net isn’t large enough.
5. What if I never have a big emergency? Isn’t that wasted money?
It’s not wasted. The money is still yours – you can eventually redirect it toward a house down payment, a business, or early retirement. Meanwhile, the peace of mind it gives you is invaluable. As The Psychology of Money teaches, the greatest dividend of saving is the ability to wait.
A tiered emergency fund transforms vague anxiety into a structured plan. Start with Tier 1 today. Then layer up. Your future self – calm, prepared, and resilient – will thank you.